Experimenting with Seam Carving
Seam Carving is a technique for smart image resizing developed by Shai Avidan and Ariel Shamir. It’s cool. It’s really cool actually! It let’s you resize an image without having to lose important information, so for example, if there’s a face in the photo and a background, the background will shrink while the face will maintain its size. There are plenty of examples on the web and some very cool videos, so let’s have a taste of them first.
There is also a large number of implementations and in many different languages, including Java, C++, JavaScript and more.
Yesterday I wanted to integrate this cool technology into one of the outbrain features I’m working on, so here’s what I’ve learned:
First of all, it’s really cool, did I mention this? ![]() .
.
I used a Java implementation by Mathias Lux from here (thanks, Mathias). In general, this is a very nice work and I only had to fix but a few bugs to get it going ![]() .
.
When I first started using it I noticed two problems:
1. It’s slow. Any I mean – painfully slow! nothing that production code can live with. An average photo would get resized in about 30-60 seconds. No go, no good, no no no.
2. It doesn’t always do the right thing… I mean sometimes the result of the resize is sort of lame… Let’s have a look at some examples.
Before:

Before carving
After:

After carving
Hmm, that’s not so good, right?… See how that poor man’s face is distorted?
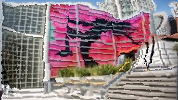
Here’s another one. Before:

Before Carving
And after carving. Notice the building roof… it seems to have endured a little earthquake…

After carving
So, you see, I had a problem… The algorithm was correct, no problem with that, but perhaps this was not the best solution to what I was trying to achieve… What was my goal then? My goal was to have all images resized to the same size (in this case 178×100) without having to letterbox or crop them. But I don’t mind so much that a face in the photo gets smaller, that’s perfectly OK by me, as long as the face doesn’t get but in the middle.
My solution:
Here’s what I did – Instead of using the seam carver right from the beginning, first I resized the image using a simple linear resize operation such that the photo would exactly match one of either the width or the height of the target photo, and only then did I run the seam carver.
For example, if the original size of the image was 300×300 and I wanted the target size to be 100×50 I first resized it to 100×100 (so the image fills the entire width, and overflows the height) and only then use the seam carver to reduce its height.
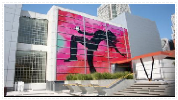
The results were amazingly well! Performance dropped to about 500ms per photo (still, I can do better, but this is already a big improvement and can go to production) and most importantly, the photos look good now. Compare the following two resized and carved photos with the initial results.

Improved resized

Improved resized
That did the trick, nice ![]() .
.
Nice try man! Very informative post! Thanks for sharing them!
By thesis on Mar 16, 2010